Install Mounting Nuts
Mounting Nut Preparation
- Tape a piece of P180 grit sandpaper to a flat glass plate.
- Abrade each side of the mounting nut by holding it flat against the sandpaper and rubbing in a figure-of-8 pattern.
- Put the mounting nuts in a bath of isopropyl alcohol and agitate to degrease them.
- Thread each mounting nut onto an M3 x 30 mm screw. The threads should engage by ~4 mm.

Mounting Nut Installation
Note: the Loctite 3090 has an extremely short work time, so these steps must be performed very quickly. Make sure that the supplies are prepared before starting, and use two operators.
- Setup a glass plate on the edge of a workbench and prepare some small G-clamps.
- Place the transducer module on a flat surface, with the mounting nut recesses facing up.
- Fit a nozzle to the Loctite 3090 syringe barrel, squeezeout ~0.5 ml of adhesive and discard it.
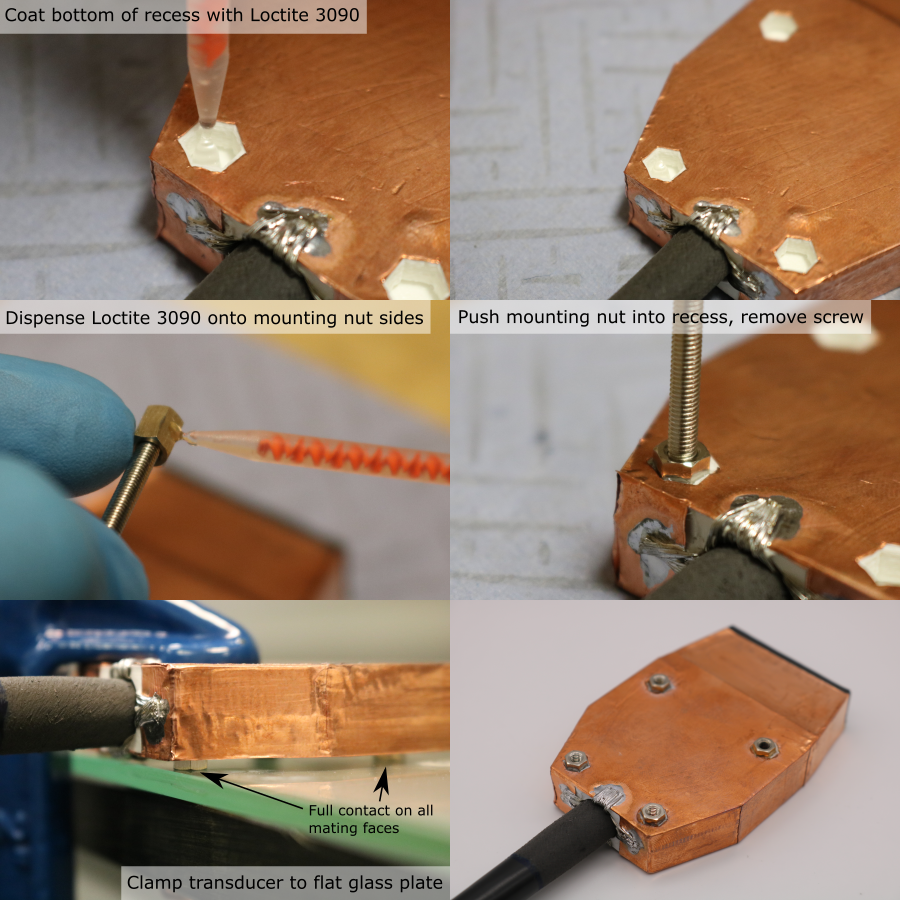
- Quickly, dispense a small drop of Loctite 3090 into the bottom of the mounting nut recess.
- Spread it around with a wooden cocktail stick to cover the entire bottom face.
- Dispense Loctite 3090 on to all six sides of the mounting nut.
- Push the mounting nut into the recess, and remove the screw.
- repeat this for all 4 mounting nuts in the transducer module.
- Clamp the transducer module to the glass plate using a small G-clamp, with the mounting nuts facing down. Make sure that the end of each mounting nut is flat against the glass.
- Allow the adhesive to cure for 1 hour before removing the transducer from the glass plate.